

Before we get into the full story, here’s a running list of the equipment, tools, and materials used throughout the Home Hash Lab build.
This list will keep getting updated as new episodes come out. Some of this stuff was purchased, some of it was already lying around, and some of it, like the 4-inch insulated panels, was scored for free from a local construction project.
Also worth noting: you do not need to copy this build exactly. In my case, I used what I had access to. For most small cold rooms, 2-inch insulated panels would likely be plenty if the room is sealed properly.
Equipment Used
Hashtek Equipment
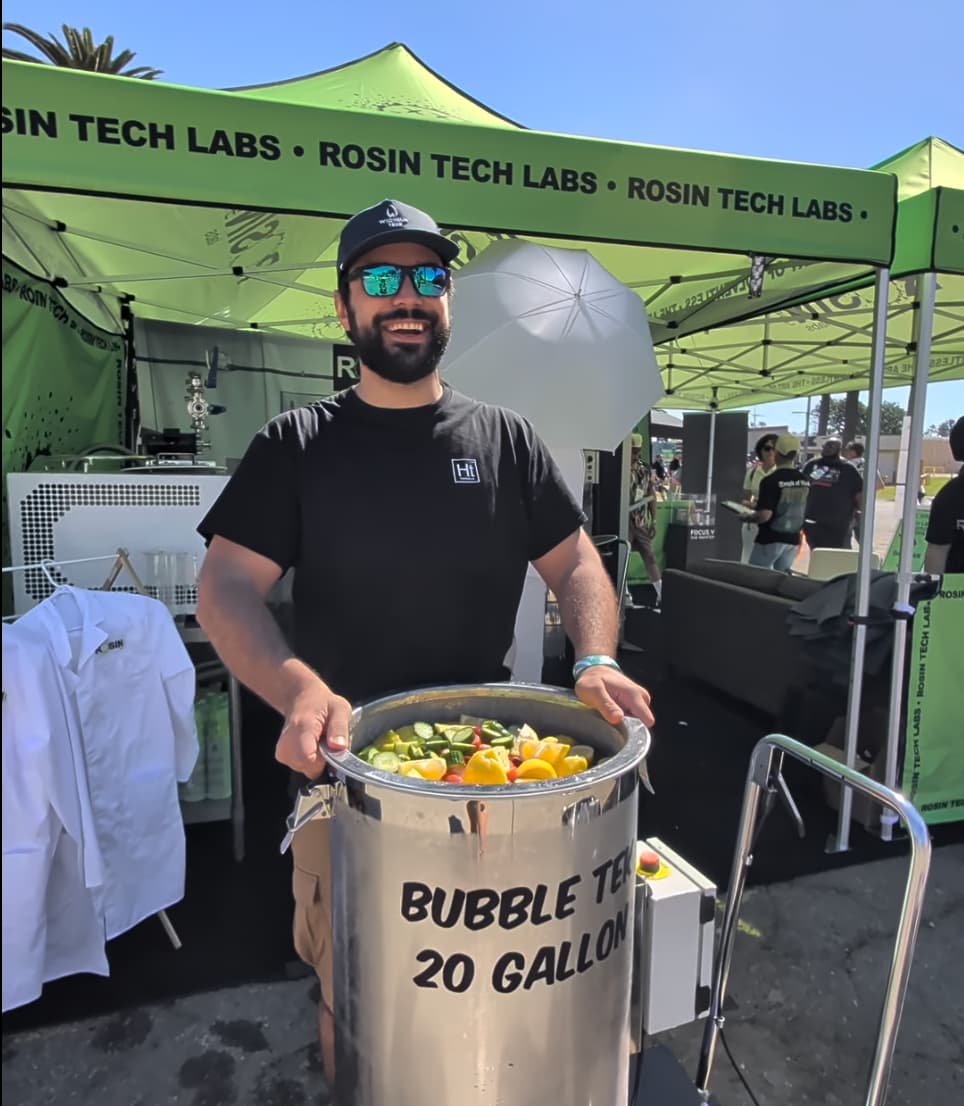
- Hashtek Legendary Mini Bundle
- The main washing setup for the room. This gives the lab a compact, serious hash-making workflow without needing a full commercial facility. I used the 20 gallon bundle but you may consider the 30 gallon Legendary Mini Bundle for increased capacity.
- 160-gallon water tank
- Used for holding and managing cold water in the room. I ran a 1/4-inch water line to it and installed a float valve so it can refill without babysitting it. If you buy one of the Craft Chill Kits or an Epic Mini Bundle it will come with all the fittings, float valve kit and a water chiller. I opted not to use a chiller for this build since I already have a large ice machine.
- Hashtek Epic Mini Bundle
- If you want a bundle that comes with a water chiller and water tank included then check out the Epic Mini bundle this combines the Craft Chill Kit with the top selling Legendary Mini Bundle.
- Staggered Collection Bags
- Made in collaboration with our friends at Rosin Evolution these innovative bags create natural separation between the different micron levels.
- Consider this Hook Rack for drip drying bags
- Hashtek 4 Hose Holder
- As featured on episode 12 this hose holder organizes your sanitary silicone hoses and gives them a clean spot to drip dry.
Cooling Equipment
- Goodman 18000 Btu Mini Split & Condenser
- Check the AC compatibility list, I had bought a Senville mini split I had to return because it was not compatible with the heated temp probe trick to cool below its minimum set point.
- Wall-mounted condenser bracket
- Refrigerant line set
- Nylog for Flare Fittings
- Inkbird for Temp Control
- See here for the full guide on how to use an Inkbird + small USB heater to cool below the AC minimum set point
- Mini 5v USB Heater
The cooling system is what lets the room function as an actual cold workspace instead of just an insulated room. Most mini splits are made for comfort cooling, not 39-42°F cold-room use, so this requires the heated temp probe hack.
Tools Used
Cutting Tools
- Milwaukee circular saw
- Metal-cutting blade
- I used this Diablo blade and it worked great.
- Tin snips (Left, Right & Straight)
- Milwaukee pipe cutter
- Probably overkill for most people but damn is this a fun tool
- Fastback Knife
- Stanley Measuring tape
- 48″ T-Square
The circular saw ended up being one of the most important tools in the early part of the build. When cutting the insulated panels, the cleanest method was cutting both sides with the circular saw instead of cutting one side and finishing with a hacksaw.
Drilling and Fastening Tools
- M12 Surge
- This is honestly one of our favorite tools at the Hashtek shop. Once you go surge, there is no going back to a standard impact gun.
- SDS Plus Hammer Drill
- This was used for the anchors that initially secured the insulation to the concrete walls as well as the anchors for the mini split condenser bracket
- SDS Max drill
- I had a friend lend me his SDS max drill for the plumbing but if you really want to ball out the corded Bosch one is a good deal.
- Hole saws
- These carbide hole saw kits are great for everything from thick stainless steel, to thin sheet metal and everything in between
- Concrete bits
- Used for various tapcon bits
- Driver bits
- Self-tapping screws
- These were used for all the trim, conduit and everything that needed to be secured to the insulating panels
- Concrete anchors
The SDS Max drill was especially important for the sink drain because we had to get through insulation, drywall, and concrete block. Once you see how thick that wall was, the ridiculous size of the drill starts making a lot more sense.
Sealing and Finishing Tools
- Caulking gun
- Treat yourself to the Milwaukee electric caulking gun, building a hash lab is probably more caulking than most people do in an entire lifetime.
- Big Gap Foam Filler
- Paint brush / roller kit
- Sawhorses
- Shop vacuum
- T-Shirt Rags and cleaning supplies
The caulking gun got a lot of use because sealing the room is just as important as insulating it. Insulation slows heat transfer, but air leaks are what really make a cold room struggle.
Plumbing Tools
- ABS pipe cutter
- Pipe deburring tool or knife
- Adjustable wrench
- Knipex Pliers
- These are the best pliers you will ever buy, your grandchildren will fight over these
- Drill bits for plumbing penetrations
- Always go for the cobalt option. This makes for a true multi use bit that wont dull the first time you use it for metal (especially stainless).
- Level
- Bucket for testing drains
Content Creation Tools
- Insta 360 x5
- This has quickly become one of my favorite cameras
- Meta Glasses
- Great for those POV shots that you just would not get if you had to set up a camera
- Sony FX3
- This is the dynamic range beast behind all Hashtek long form videos, a must have for any shooting with less than ideal lighting conditions. The dual base ISO is an absolute monster in low light,
- Peak Design Tripod
- Really any tripod works but these peak design ones are my favorite. Biggest mistake I see new film makers making is moving the camera way too much. Let the subject you are shooting be the motion and keep the camera stationary.
- DJI Mic Kit 2
- People will tolerate sub par video quality way more than poor audio quality. If the audio sucks nobody will watch your video.
- 2 Pack LED Lights
- For video lighting is everything. I would get good lighting and use a cellphone before buying a high end camera.
- DJI MIni 4
- People often ask me what drone I prefer. Though I have been flying drones for over 10 years and have an arsenal of different drones the DJI mini 4 is the one I turn to most often for content creation. Ability to quickly flip from vertical to horizontal orientation is clutch. And being under 250g the regulations are much less stringent for when and where you can fly.
Materials Used
Insulation and Room Panels
- 4-inch insulated freezer/cold-room panels
- Sourcing panels is discussed further below under Part 1
- White paint for sealing exposed foam
- 100% Silicone sealant
- Self-tapping screws
- 3/8″ Threaded rod
- Large washers
- Concrete anchors
- Walk In Cooler Door Handle
The insulated panels were the foundation of the whole build. Again, the 4-inch thickness was not because that is the minimum requirement. I used them because I got them for free. If I was buying all new material, 2-inch panels would probably be the more realistic choice for most home labs.
Electrical Materials
- 12-gauge THHN wire
- 1/2-inch PVC conduit
- 1/2-inch conduit fittings
- Weatherproof / water-resistant electrical boxes
- Electrical disconnect
- Typically 60 amp, this is not your breaker this is just a servicing disconnect for the outdoor condenser. If you are unsure contact a professional.
- Wire nuts / connectors
- Water-resistant light fixture
The electrical setup had to be protected, serviceable, and appropriate for a damp cold-room-style environment. This is one of those areas where you should not guess if you do not know what you are doing. Bring in a qualified electrician where needed.
Plumbing Materials
- Stainless sink
- ABS drain pipe
- ABS elbows and fittings
- P-trap
- ABS cement
- 1/4-inch water line (Ice Maker Kit)
- Pipe straps / mounting hardware
The sink ended up being one of the biggest upgrades in the whole room. Once water, drainage, condensate, and tank filling were planned properly, the room started feeling like a real workspace instead of a temporary setup.
HVAC Materials
- Mini Split line set
- Duct Seal Compound
- Nylog Flare Sealant
- Exterior wall cover kit
- Condensate drain tubing
- Foam sealant for wall penetration
- Vacuum Pump HVAC Kit with Manifold
The mini split install was not just about getting cold air into the room. It also meant dealing with the condenser, line set, wall penetration, condensate, electrical disconnect, and sealing everything properly afterward.
Quick Note Before You Copy This Build
This is not meant to be a perfect blueprint.
It is a real-world build using the materials, space, and tools I had available. Some decisions were made because they were the best option. Other decisions were made because I got a deal, had something already, or found a way to make free material work.
That is the real lesson from the Home Hash Lab series.
You do not need unlimited money to build a clean, cold, functional workspace. But you do need to think through insulation, sealing, water, drainage, electrical, refrigeration, and cleaning from the start.
Why Cold Matters
And of course, the why.
Why operate in a cold environment? Trichome heads have a waxy outer shell that softens and ruptures more easily at warmer temperatures. When the room is kept cold, that waxy membrane firms up, allowing the heads to be collected cleanly without melting, smearing, or “greasing up” your bags.
Some processors take the room all the way down near freezing, but I find 45°F–55°F is a solid balance between operator comfort and keeping the resin intact..
The Story
The whole thing started with an old indoor grow room.
Since switching over to growing more for resin production, I have been doing most of my cultivation outdoors. That left me with this indoor room that was begging for a use, but it was not set up as a cold lab. It needed insulation, sealing, refrigeration, water, drainage, and a better workflow.
So I started converting it.
Part 1: The Foundation
The first big step was insulating the room.
I used 4-inch tongue-and-groove insulated panels because I got them free from a local construction project. They were available, insulated, and more than enough for what I needed. They had been used at a local Tim Hortons food manufacturing plant for their walk in freezers. These freezers were so large that the offcuts were big enough for me to build a hash lab.
There are two main styles of insulated panels you will usually see: tongue-and-groove and camlock.
Tongue-and-groove panels slide together with a male/female edge. They are simple, strong, and work well for small cold room builds. They do not mechanically lock together, so the final seal depends on how well you fasten and seal the seams.
Camlock panels are more common for pre-fabbed walk-in coolers. Built-in locks pull the panels tightly together, making them faster to assemble, easier to take apart, and generally better for labs dropped into large spaces, not built to fill a room. They are also usually more expensive and harder to source used in the exact sizes you need.
For a small hash lab, camlock panels are nice, but not mandatory. The goal is simple: slow heat transfer and stop warm air from leaking in.
For most small rooms, 2-inch insulated panels are probably enough if the room is sealed properly and the cooling system is decent. 3 Inch is the most I would go for if buying new. Four-inch panels add efficiency and temperature stability, but the biggest improvement is going from no insulation to insulated walls at all.
The main thing is sealing. Thick panels with bad air leaks will still perform badly. Warm air will find every gap, seam, door edge, and wall penetration.
Cutting the panels was the first real challenge. I started by cutting one side with a circular saw and finishing with a hacksaw, but the cuts were rough. The cleaner method was running the circular saw on both sides of the panel.
Sourcing Insulated Panels
Used panels can be a great score if you find an old walk-in cooler, restaurant closure, or commercial demo project, but availability is hit or miss. For new panels, look for insulated metal panel suppliers, walk-in cooler manufacturers, commercial refrigeration companies, or building envelope suppliers. Search terms like “insulated metal panels,” “cold room panels,” “walk-in cooler panels,” or “IMP panels” will usually point you in the right direction. New panels cost more, but you get cleaner material, matching sizes, better seals, and fewer surprises during the build.
Part 2: Sealing the Room
Once the panels were cut and installed, the next job was sealing everything.
This is the boring part that actually matters.
Corners, seams, panel joints, weird gaps, old openings, and transitions all become weak points. If warm humid air can get into a cold room, you are going to fight temperature swings, condensation, and wasted cooling capacity.
From a building-science standpoint, cold rooms are basically condensation traps if you do them wrong. When warm humid air hits cold surfaces, the moisture can condense. That is why air sealing and vapor control matter so much in cold spaces. Closed-cell foam insulation can help with vapor resistance, but you still need a proper air barrier system.
That is also why I care so much about making everything easy to clean. You do not want exposed foam, open seams, wet hidden corners, or rough surfaces that are hard to wipe down.
My buddy Rick came by and really showed me how to do all the trim work and sealing. He shares a cool trick on using the back of a spent silicone tube to clean out the seams for a perfect finish.
Part two was where the room started changing from “insulated box” into “actual controlled workspace.”
The lesson:
Insulation gets all the attention, but sealing is what makes the room work.
Part 3: Mounting the Mini Split Head
Once the room was sealed up, it was time to start getting the refrigeration sorted.
For the indoor mini split head, I did not want to just screw the bracket into thin panel material and hope for the best. Insulated panels are great, but you have to think about how loads are supported.
I had an old unused window in the room, which gave me a way to access the back side of the panel. I used threaded rod, large washers, and backing support to clamp the bracket in place properly.
That is way stronger than trusting sheet metal screws into the skin of the panel.
We also cleaned up the conduit and pulled 12-gauge THHN through for the wiring. Hot, neutral, and ground, protected and serviceable.
This is one of those areas where I am going to say the obvious thing: if you are not comfortable with electrical, hire someone. A cold room is not worth burning your house down over.
The lesson:
When mounting equipment to insulated panels, think about clamping and backing support. Don’t treat panel skin like structural framing.
Part 4: The Condenser and Line Set
Part four was when the project really started feeling serious.
We mounted the outdoor condenser using a wall bracket and concrete anchors. I used an SDS drill to drill the holes, set the anchors, and added vibration-dampening feet to reduce stress and vibration.
The line set was run through a PVC sleeve, and the opening through the wall was sealed afterward.
This is also where the electrical disconnect came in. A disconnect near the condenser is standard practice for safety and serviceability. It gives someone working on the unit a clear way to shut off power at the equipment.
I also used Nylog on the flare fittings. The point there is to help reduce the chance of tiny leaks at flare connections. Refrigeration systems are not forgiving if you do sloppy work.
Then everything needed to be pressure tested and vacuumed properly.
The lesson:
A cold room is not just an AC unit slapped on a wall. It is insulation, sealing, electrical, drainage, refrigeration, and airflow all working together.
Part 5: Vacuum Test, Flares, and Bringing the Mini Split Online
Part five was where the mini split actually came online.
This is also where I learned why a proper digital vacuum gauge matters.
A cheap analog manifold can make you think everything is fine, but a digital vacuum gauge gives you a much clearer picture of what is actually happening. If the system has a tiny leak or moisture still boiling off inside the lines, a digital gauge will show that way faster and more accurately.
That matters because a mini split is a sealed refrigeration system. If the flare fittings are not sealed properly, or if the system is not pulled down and tested correctly, you are asking for refrigerant leaks, poor performance, and a headache later.
I ended up redoing the flares and using Nylog properly. The key detail was applying it to the face of the flare, not just smearing it all over the entire fitting like a caveman.
Once the digital gauge confirmed the system could hold a steady vacuum, I released the refrigerant from the condenser and brought the unit online.
That was the moment the room officially stopped being just an insulated box and started becoming a cold room.
The lesson:
Do not cheap out on the part of the job that tells you whether the system is actually sealed. A digital vacuum gauge can save you from thinking you did a good job when the system is quietly leaking. It is probably more economical to hire someone to do this portion unless you are a die hard DIYer.
Part 6: The 39°F Problem
Most mini splits are not designed to cool a room down into the high 30s°F.
They are built for comfort cooling. A normal person wants their room around 68-72°F, not 39-42°F.
That creates a problem when you are trying to build a cold workspace.
In my setup, I used a temperature-control workaround to get the room sitting around 39-42°F. The basic idea is that the unit needs to keep running even though the room is colder than what the factory control would normally allow.
I am not presenting that as universal advice because not every mini split will tolerate the same thing. Some newer units are too smart and fight the workaround. I actually had to return a Senville unit because it would not cooperate. The Goodman unit worked better for my setup. LG is the recommended brand for this type of hack.
There are also commercial products designed for this kind of cold-room control, like CoolBot-style systems, but compatibility still matters. And of course you can always get commercial refrigeration equipment designed for the task but that is usually overkill for a home lab.
The big risk with forcing an AC lower than designed is coil freeze-up. If the coil gets too cold and moisture freezes on it, airflow drops, efficiency tanks, and you can damage equipment. That is why control strategy matters. You do not just want the thing running nonstop like an idiot.
The lesson:
The goal is not just “make it cold.” The goal is stable, controlled cold without freezing the coil or destroying the equipment.
Part 7: First Real Wash in the Home Hash Lab
Part seven was the first real proof-of-concept wash in the lab.
Jordan, also known as Solventless Tech, came by with some of his own homegrown material. Jordan welds for Hashtek, but he is also a grower, so it was the perfect first real test for the space.
The process started by pre-chilling the system.
We added ice to the collection vessel first, which let us get the water and stainless cold before the wash. That makes a big difference because once the system is cold, you do not need to dump in a stupid amount of ice during the actual run.
For this wash, we used just under 6 pounds of ice.
Once the water hit temperature, we loaded the mesh basket, dropped the unit into place, and used the pre-soak screen to keep the material submerged. Freeze dryer trays made great weights because they are clean, flat, and already part of the workflow.
After a 5-minute soak, the machine took over with gentle agitation.
That is the whole point of the Legendary Mini Bundle in this kind of room. You are not hand-paddling forever, and you are not beating the material up with some aggressive bottom impeller. The goal is controlled agitation that separates trichome heads without turning the wash into soup.
The best part was that once the process was running, we could step away for a bit. We literally grabbed burgers while the system did its thing.
When we came back, we collected clean trichome heads and moved them straight into the freeze dryer.
Cleanup was simple: dump the mesh basket, rinse the vessels, and reset the room.
The lesson:
This was the first time the room proved itself. Cold water, cold stainless, controlled agitation, easy collection, and simple cleanup. That is the whole point of building the space properly.
Part 8: The Insulated Door
You can build a beautifully insulated room, but if the door is uninsulated that becomes the place where heat keeps pouring in.
So I used another insulated freezer panel and fastened it to the existing door.
We cut it outside to control the dust, then sealed the exposed foam with white paint so it would be cleaner and more sanitary. Peter helped with this part. He is a banker, not a tradesman, but he is a professional panel holder at this point.
Once the panel was fastened on, the door basically felt like a bomb shelter.
We still need to add a larger gasket for the door, but the insulation part is complete.
The lesson:
A cold room is only as good as its weakest surface. Don’t spend all your effort on the walls and forget the door.
Part 9: Every Hash Lab Needs a Sink
This was one of the biggest workflow upgrades.
Every hash lab needs a sink. There is no way around it.
For this part, I called in my friend Abid because he is a plumber, and naturally, if I am about to drill through insulation, drywall, and concrete block to run drainage, I want someone there who actually knows what they are doing.
He showed up with an absolute monster of an SDS Max drill, which made sense once we saw how much material we had to get through.
We bored through the wall, cleared the bit repeatedly so it would not bind, and pushed ABS pipe through for the drain. Then we set the sink in place, installed the P-trap, and cut the ABS with a Milwaukee pipe cutter.
I also ran a 1/4-inch water line for the 160-gallon tank and installed a float valve so the tank can fill without me babysitting it.
The sink also became the drain point for the mini split condensate and the drain line from the Legendary Mini Bundle. That is the kind of stuff that makes the room feel way more usable. Instead of everything being temporary, it starts becoming a proper workflow.
We also added hooks to drip-dry wash bags.
The lesson:
Water management is not glamorous, but it is one of the biggest differences between a room that technically works and a room you actually enjoy using.


