Applying Pressure with Select Pheno
Note from Aleks at Hashtek: After seeing some of the crystal clear presses on the Select Pheno instagram page, I knew I had to learn more about this process. They were pressing huge amounts of hash in one go, filling 4oz jars in one press with crystal clear rosin. Any time I tried to press that much hash in a single press I would be plagued with blowouts and my hash rosin never looked as clear coming out of the bags. When Select Pheno contacted us about purchasing an A-series for their hash lab, I knew it would be an opportunity to learn about this technique and share it with our follwers.
Hello fellow hash heads! Thank you for taking time to check out our blog with Hashtek detailing the SelectPheno process of pressing hash into rosin.
We specialize in non-solvent separation which is a delicate art of mechanically isolating and collecting the true fruit of our favorite plant. We’ll look to break down the various steps in our specific process of pressing high quality hash rosin.
A nod to our amazing community. We’ve learned and adapted techniques from many amazing hash and rosin makers and we are humbled to be able to share the collection of wisdom below with the hopes to continue leveling up our community and allowing us all to enjoy even better hash!
Drying Hash
Regardless of your drying technique it’s critically important to ensure all of the moisture has been removed from your hash before you bag it to press. If you press hash that still has moisture or any frozen pieces that didn’t entirely dry in the freeze dryer, you end up with an unsafe product that is prone to getting mold/mildew once sealed in jars. The user will also experience a crackle when the rosin hits the nail - this is a telltale sign of moisture in your rosin.
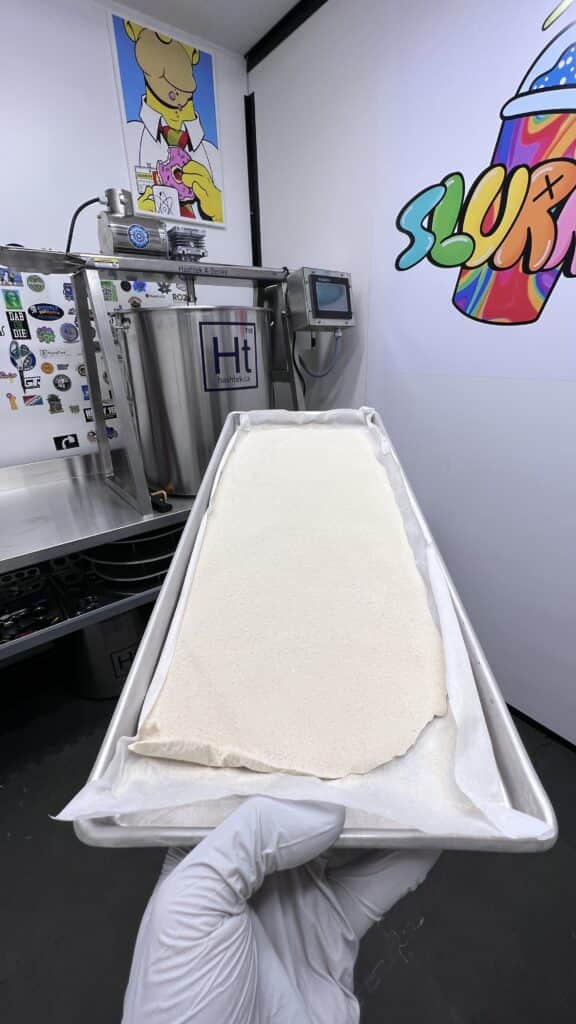
While not the only way to dry hash, the fastest and easiest method is to use a freeze dryer, and that’s exactly what we do. So, once you have your fully-dried collection of hash, the following is what we do to create rosin.
Preparing the Hash for Press Bags
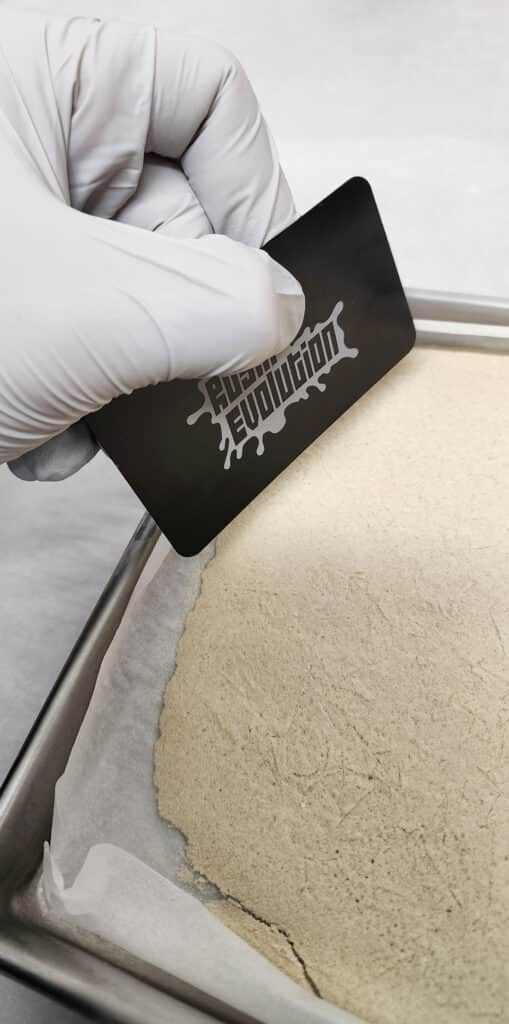
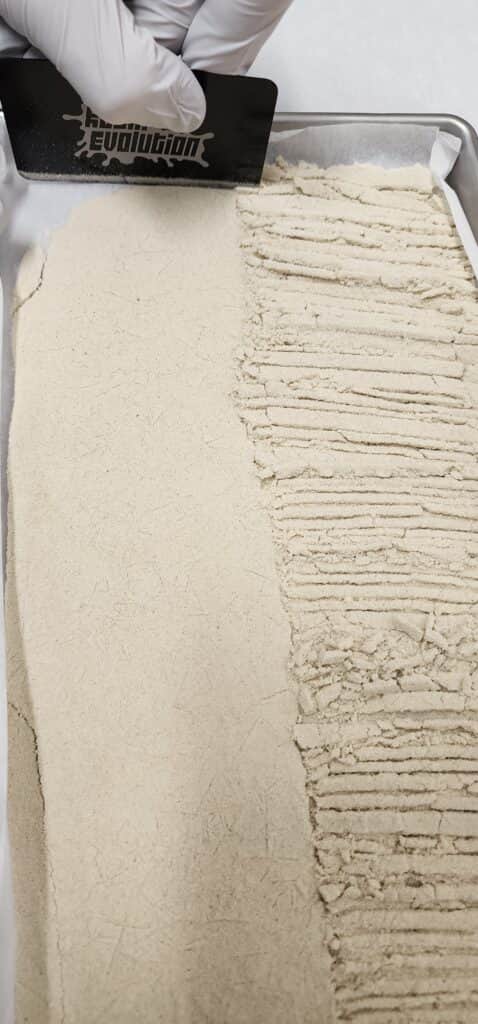
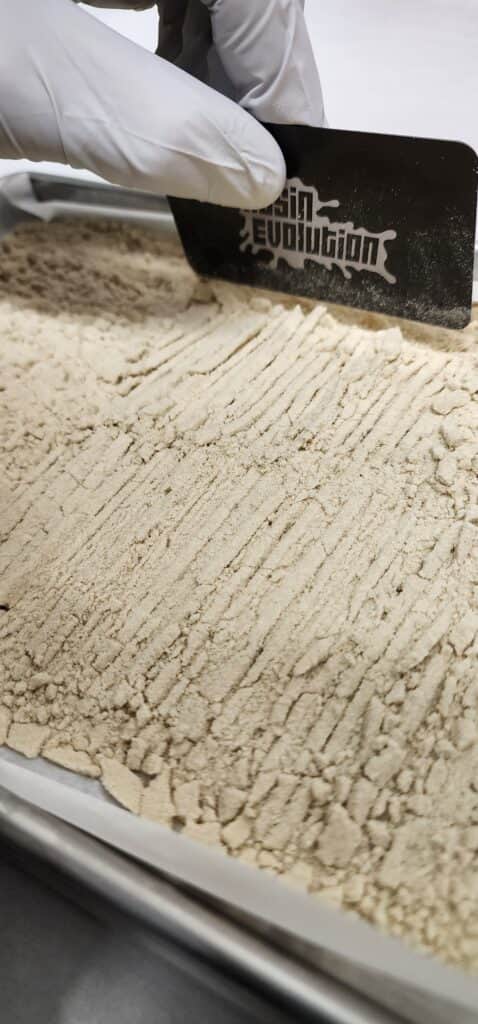
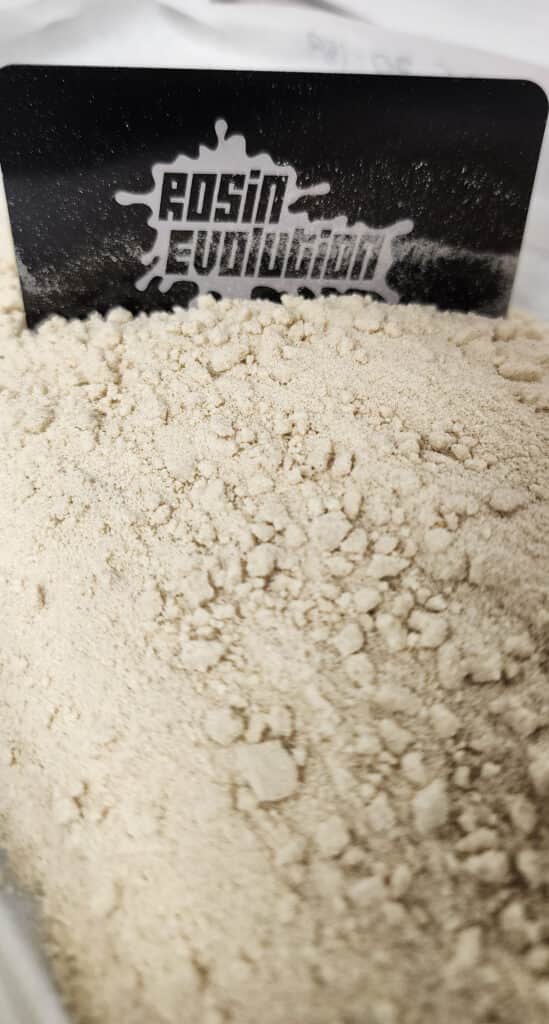
There are multiple ways to approach this piece. Ultimately you are looking for the hash to have a consistency close to sand, breaking down any larger chunks to ensure you can fill your press bags as much and as consistently as possible.
We used to employ the most common method you probably see for this - placing your dry hash collection into a metal mesh strainer and running it through that with the help of a spoon or collection card and some shaking. However, we now simply chop it up right on the parchment-lined freeze dryer tray as finely as possible using a metal collection card until we get a fine-enough consistency we are happy with. We leave some small chunks in there just in interest of handling the material a little less before getting it into a bag.
Why do we no longer use the metal mesh strainer method? Well, we find the time it takes to chop up with a card right on the freeze dry tray versus the time it takes to send through the strainer is about the same, so why expose the hash to additional items/surface area it can stick to. Plus, sending it through the strainer promotes more small resin particles being released into the air around you, rather than where you want them to stay.
Press Bags & Filtration
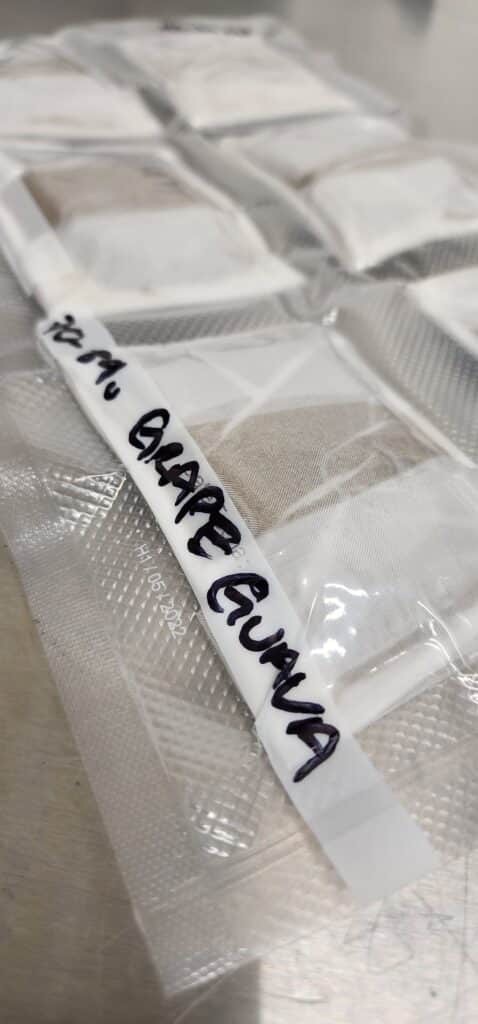
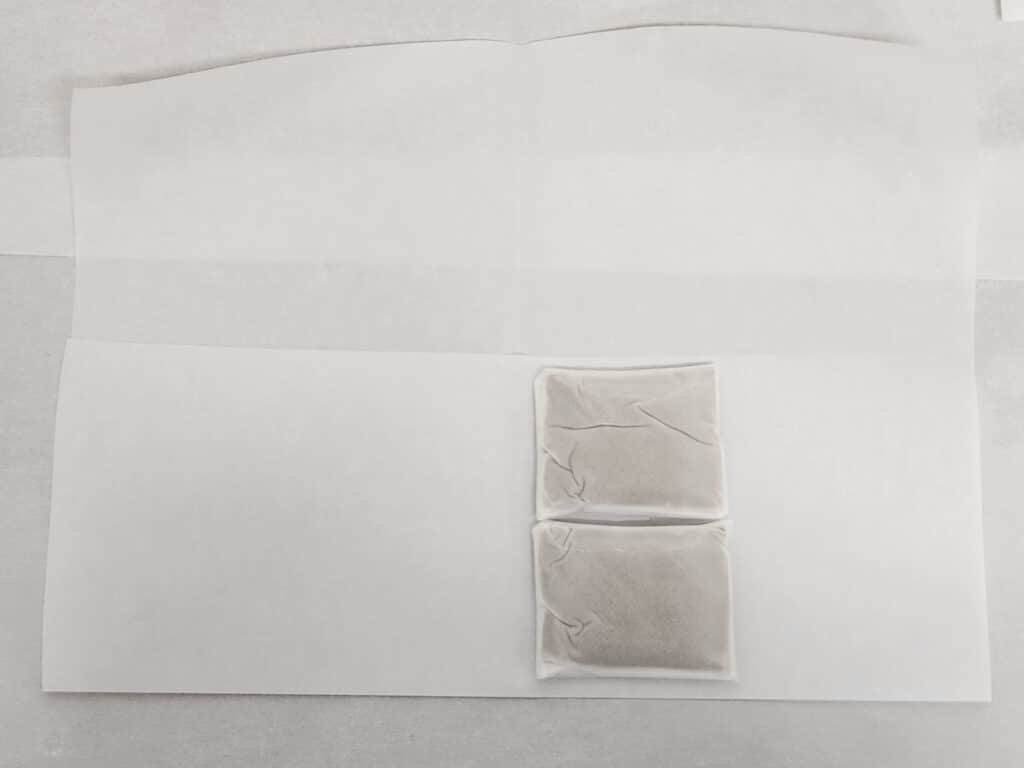
Bag Size: 2.5” x 4.5”
Quantity: (2x) 25 micron and (1x) 160 micron
Material: Food Grade 100% Nylon
We like to use three bags to ensure proper filtration and safeguards for a high quality end product. We use a small stainless steel funnel and start with a 25 micron press bag. While holding the parchment paper that has our finely chopped hash on it, we use that to fill our first 25u bag about ¾ to ⅘ of the way full. We fill this high because our next step is to hold those filled hash bags from the top with our fingers and we give them some careful shaking which helps to work and settle the hash down further to allow enough excess room at the top of the bag to fold over and seal. If we are pressing multiple bags of the same flavor, we always weigh them to even out hash quantities between all bags.
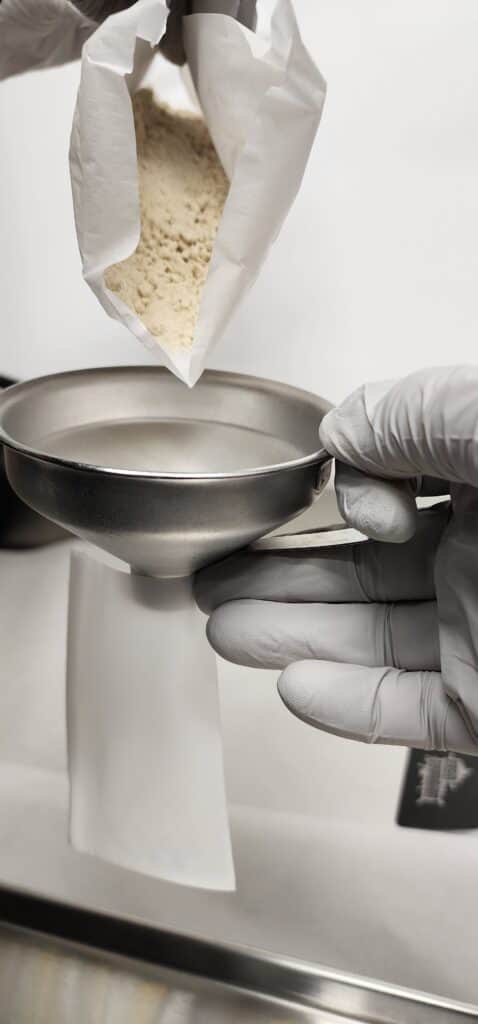
Once the first 25u bags are filled and evened out, fold the top of the bag over to seal it and place it (folded end first) into another 25u bag for additional filtration. Our reasoning to place a second 25u bag around the first 25u bag is simply because you will have fine resin particles on the outside of your first 25u bag (as a result from the filling process) that will end up making it into your final product. After this, fold over the top of the second 25u bag to seal it. Finally, we take that double-bagged “pillow of hash” and place it in a third bag which is 160u (greater than 160u is fine too; 190 or 220 will work too).
Why the third bag? It all comes down to the tensile strength of these press bags. As you go down to smaller micron bags they have less tensile strength meaning they are more prone to stretch under heat and pressure. So, the main real benefits of adding that third bag on the outside with more tensile strength is that 1) it provides a “housing” structure to those 25u bags inside which won’t allow them to stretch - this ensures you are getting true 25u filtration, 2) adding that third bag virtually eliminates the possibility of your bag sliding around or partially slipping/stretching outside of your press plates during the actual press, and last but not least 3) this third bag with additional tensile strength allows us to press much quicker with less stress, and we all know the name of the game is getting this resin on and off/away from the heat source as quickly as possible.
How much should I fill the bags?
The key is to ensure your press bag can fold over itself to seal the contents inside the bags as you press them. If you press an overpacked bag and it opens or rips, all of the contaminate the bag is supposed to retain will make its way into your final product. Nobody wants to go through months of growing and hours of processing to end up with contaminants in their rosin.
Since we use the 3-bag method with the 160u on the outside for additional strength, we can work the material down a bit and fit more hash into each bag without risking a blowout during pressing. We like to fill between 35-45g per bag (total fill weight varies by resin type/quality). Filling the bags more helps overall rosin yield and it also saves resources and time to get through the process, while still maintaining high quality.
We know we generally fill more hash in our bags than most processors. Our general thought behind this is: fill the bags as much as you can, as long as you can properly seal the bag and still press quickly enough.
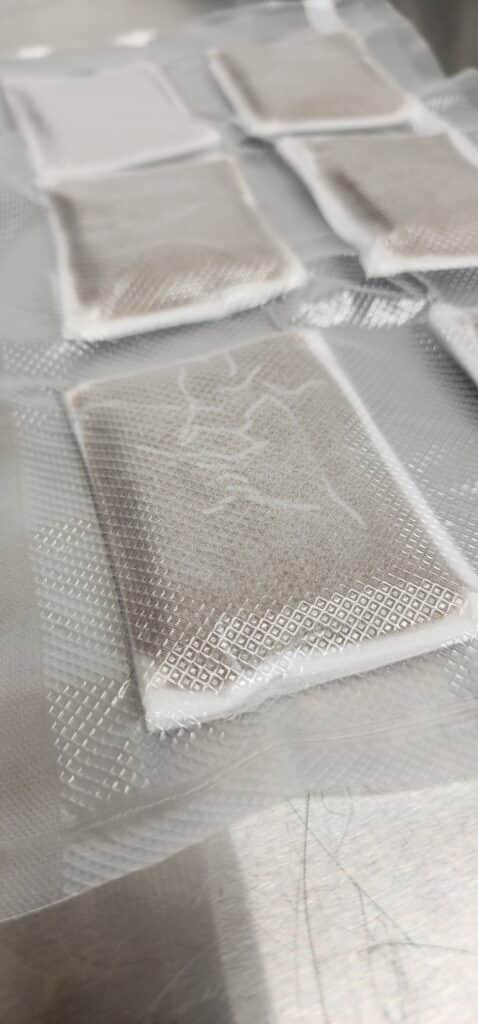
Creating the Seal
To properly seal the bags, you will need to leave a bit of room at the top of the press bags to fold over. Roughly one quarter of the bag, see example below:
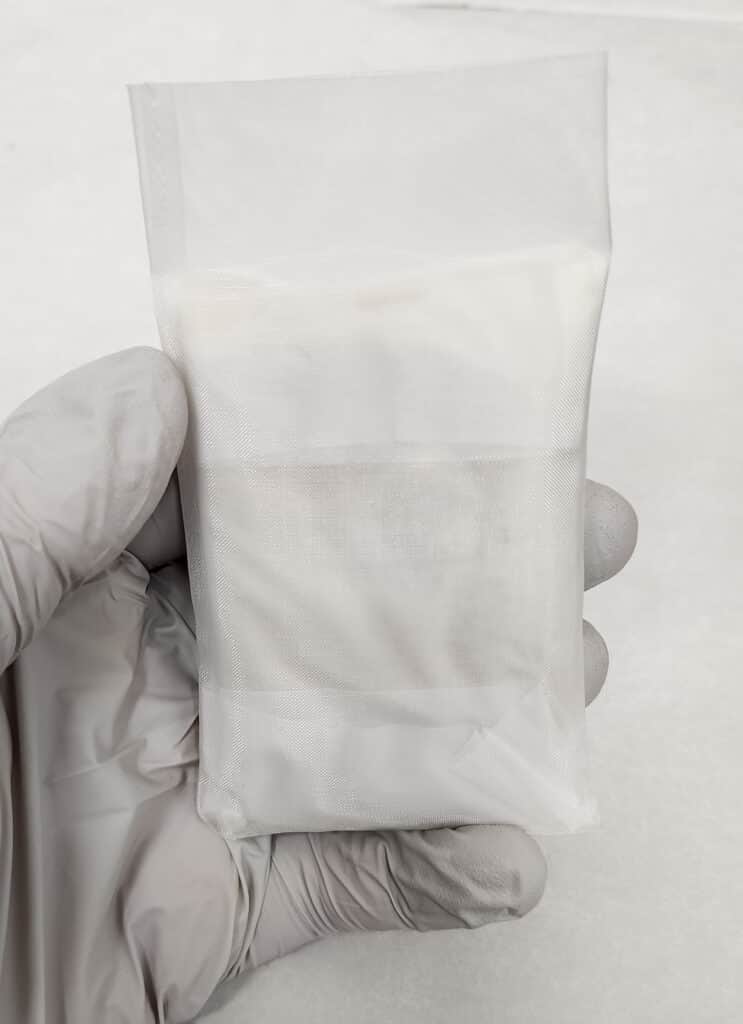
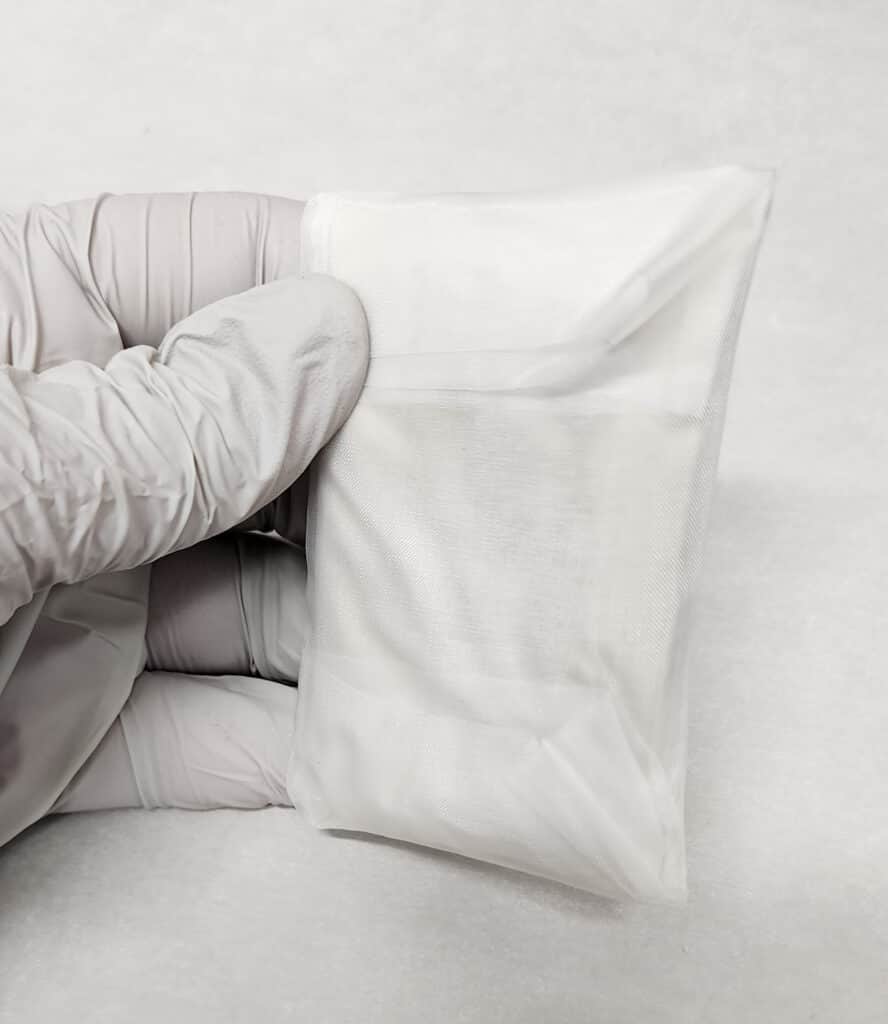
(Example above shows final press bag setup with all 3 layers of bags applied)
A Note on Cleanliness
It is critical that you pay attention to cleanliness throughout the bagging process as the entire point of the bags is to collect and retain any particulates you don’t want in your final product. As you are placing material into bags small particulates can collect on your gloves or in your work area. Those can easily transfer or collect on the outside of your press bags so pay attention and clean up or swap gloves before you start placing the first bag into the 2nd and 3rd press bag.
Preparing for the Press
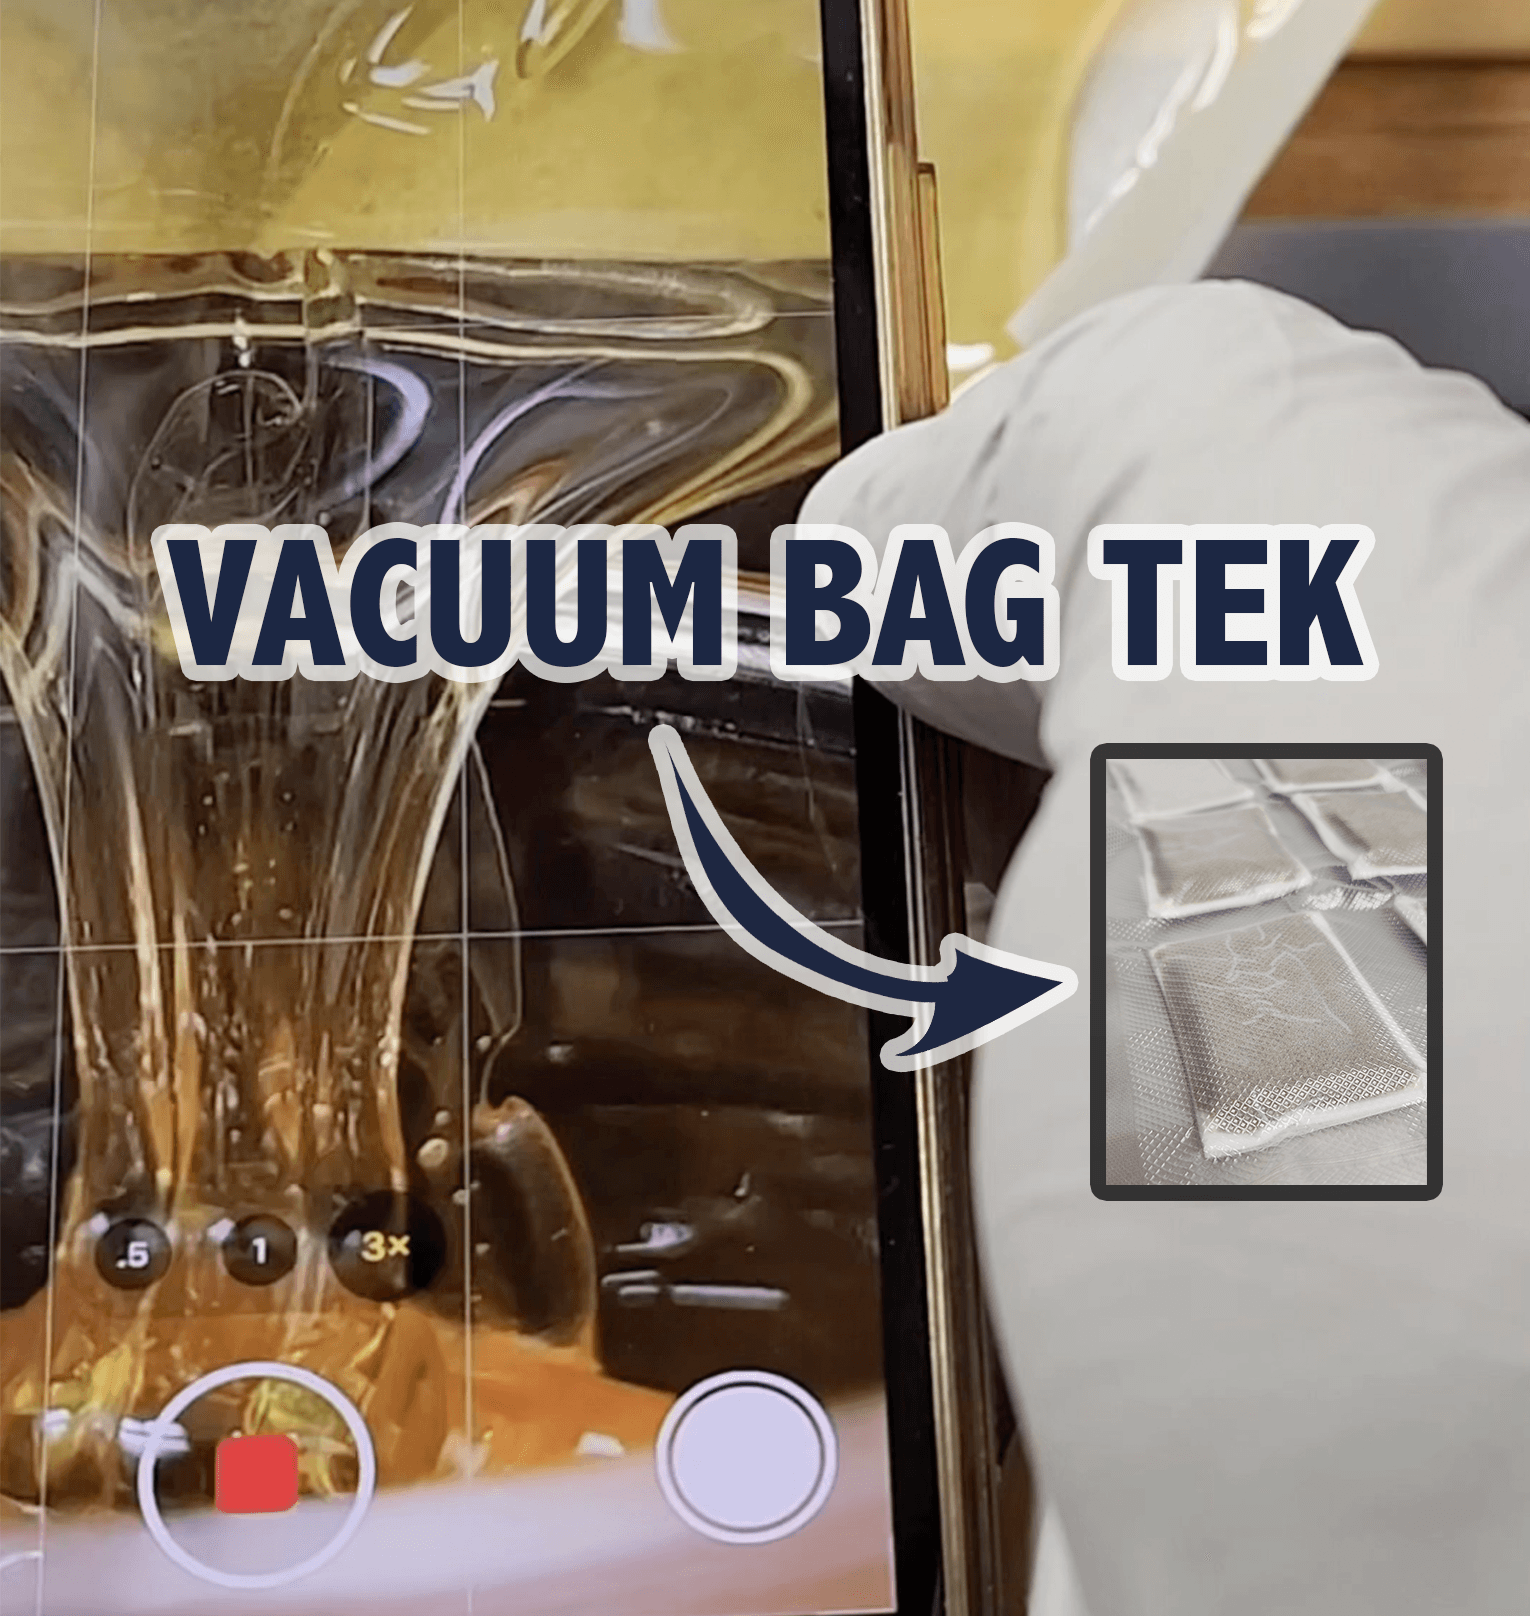
Once the bags are all packed and ready to go, our technique involves the use of a vacuum sealer to remove all of the air from the bags. This also acts as a no-heat pre-press, and pre-pressing makes a difference because it also allows you to press quicker (less air in between the resin offers slightly quicker heat transfer through the hash during the press). As a bonus, we also like how this method reduces air bubbles in the rosin which theoretically should also reduce oxidation during the cure.
We will generally pack all our bags and vacuum seal them, and then put them in the refrigerator overnight and press them the next day. Storing in a refrigerator overnight isn’t necessary, this just works best with our process timing. You can store them in the refrigerator longer if needed as well, which is a nice option to have.
Important to note - if you’re dealing with high quality resin that is very melty, it’s smart to wrap a piece of parchment paper around your press bags before vacuum sealing them. We’ve had bags that have actually greased down in the refrigerator and been so melty that rosin is squeezed out of the press bags from the vacuum seal pressure alone. If this happens, the resin will stick to the inside of your vacuum bags, and you don’t want that because you will lose some good melt.
Parchment for Pressing
To prepare for the press you are going to need some parchment paper. How much will vary based on the size of the bags you are pressing, so we typically cut from a roll of parchment as opposed to using pre-cut parchment. However, pre-cut parchment will save you a decent amount of time.
For rough measures we take the bags we are going to press and lay them side by side vertically on the parchment and measure out about 3x total bag lengths, adding a smidge extra as a buffer to be safe. We then take the piece of parchment and begin folding into our directional flow pocket to guide the rosin away from the heat as quickly as possible. When folding parchment for a directional flow be sure to mind your creases! This is an important step to direct the flow of the rosin where you want it.
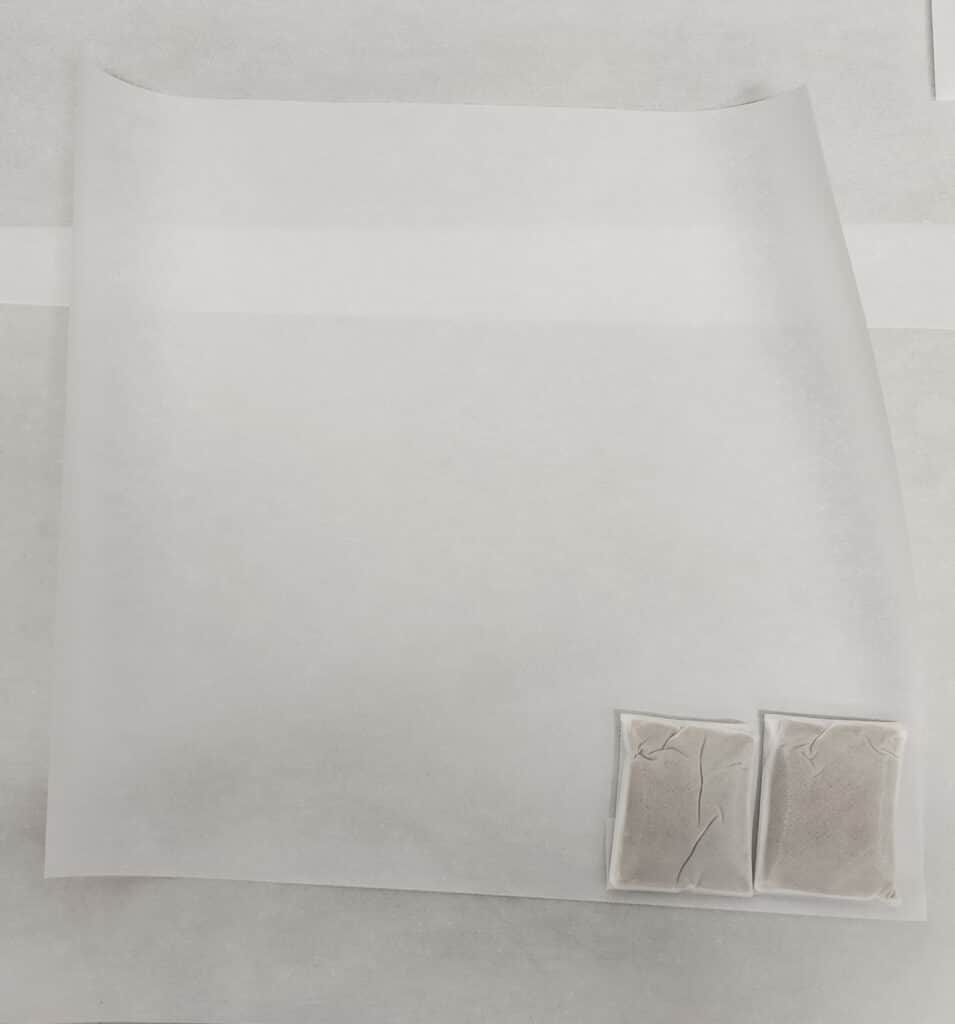
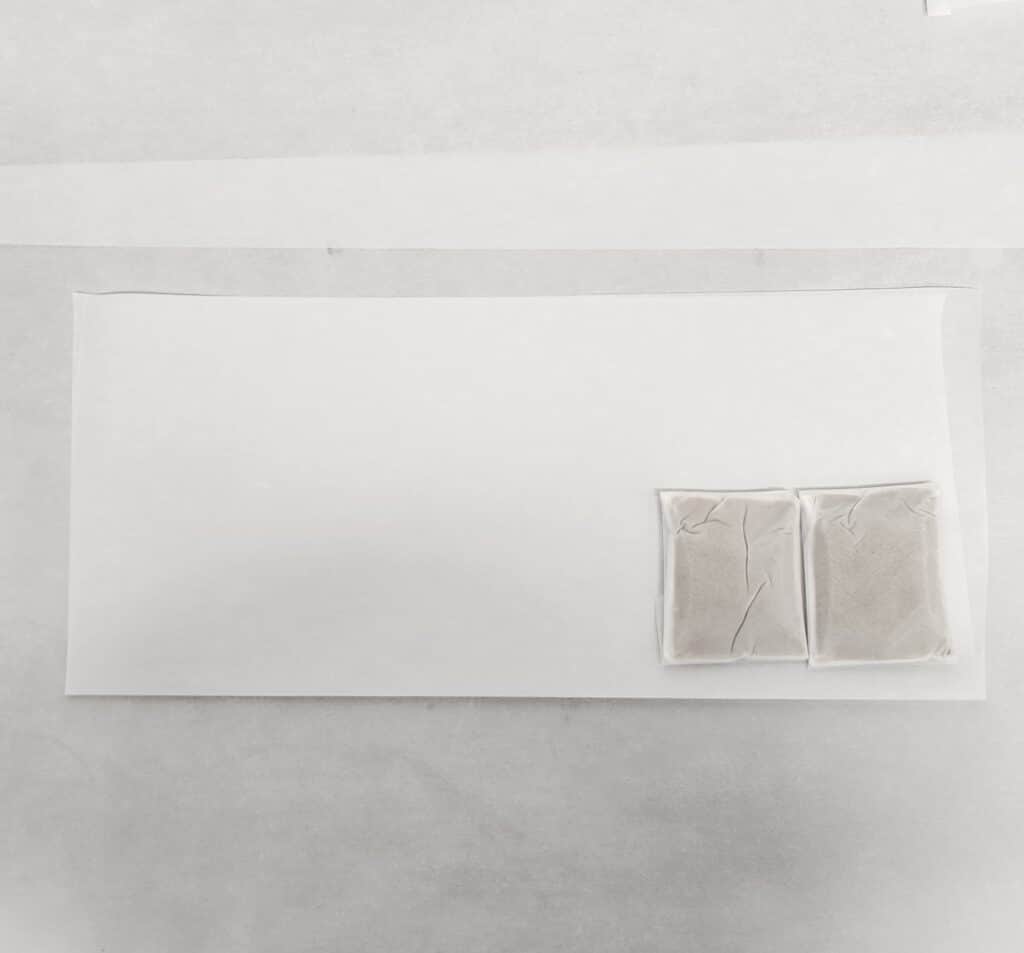
After you fold your parchment in half and crease it well, you open that up, rotate 90 degrees and start folding in about one third of the way or a little more than the bag height shown in the example below:
Repeat that step on the other side of the parchment to complete your pocket.
Directional Flow Pocket
To get your directional flow to look like the examples below you will need to cut some of your parchment off and fold some additional areas to direct the rosin where you want it to go. The extra cuts are not necessary, but we do so just so we have better visibility to the bags and rosin while on the press.
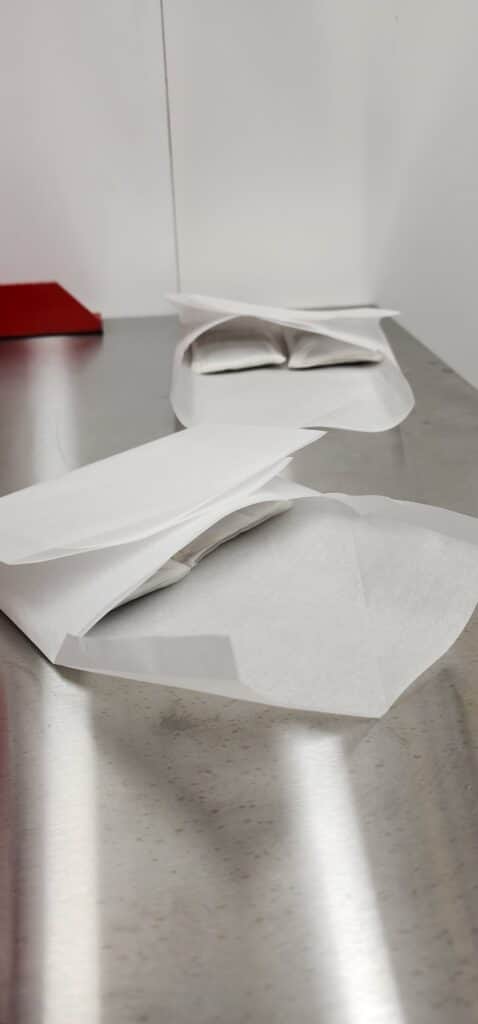
As we’ve discussed, our goal during the press is to get the rosin off and away from the heat source as quickly as possible. This is why we use a directional fold to guide the rosin into a collection jar. We prefer this method over allowing all the material to drip down a full sheet of parchment in order to limit the amount of oxidation experienced through the press process, which helps to preserve the final product and reduces the overall amount we are handling it.
We tend to press 2 bags at once for efficiency and we work to ensure that both bags are around the same size/weight so they are pressed evenly throughout the process.
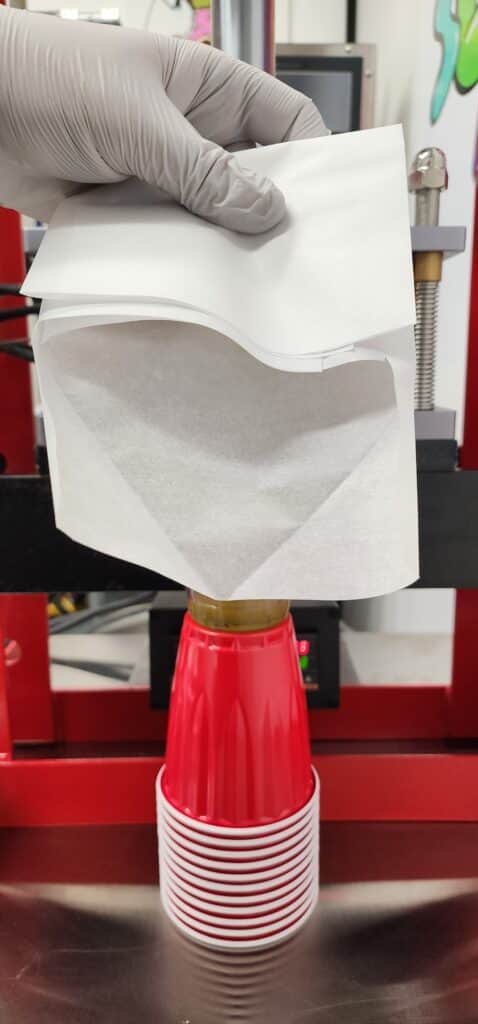
The Press
Now to the fun part - the press! Our method uses a 10-ton hydraulic table press paired with press plates that individually heat & measure temperature on both the top and bottom plates. Having temperature control on both plates is preferred for a consistent heat across the bag as you press it. Our preferred press plates also have two heating elements per plate which supports more-even heat distribution and reduces hot-spots.
Your browser does not support the video tag.What Temperature?
When it comes to temperature, you need to adjust based on the cultivar. We typically press between 160-200 degrees fahrenheit. Material will influence what temperature you want to press at, and press temps will influence how long it takes to press the material. It’s a balancing act - you want to press at a temperature that will allow you to have the press completed as quickly as possible, without too much pressure build up, but at the same time you want to press at a low enough temperature that will retain as many of those volatile terpenes as possible. What we are saying is - there is not a “one size fits all” temperature to press at. If your material is extremely melty and high quality, we would suggest turning down the temp even lower than our typical range mentioned above.
Press Duration and Pressure
Typically our press times fall within 1:45-2:00 minutes. We slowly build up pressure throughout the duration of the press - the key is to be smooth and not too fast but not too slow, so the best way to do this is to keep an eye on your pressure and gradually increase it.
Once the press is complete we pull it off of the plates as quickly as possible and seal the jar. We’ll then let the remaining rosin on the parchment cool before collecting and adding it to the jar.
The Cure
The steps outlined above are what we follow with cold-cure rosin badder being the end-product/consistency in mind. We allow our rosin to cold cure between 58-68 degrees fahrenheit. We leave the jars sealed and wait until it nucleates before homogenizing (whipping) with a brushless drill and stirring tool.
Thank you!
We appreciate you checking out our work and hope you found this post insightful. Don’t hesitate to reach out if you have any alternative techniques to try, we are always interested in sharing info for the betterment of the craft.