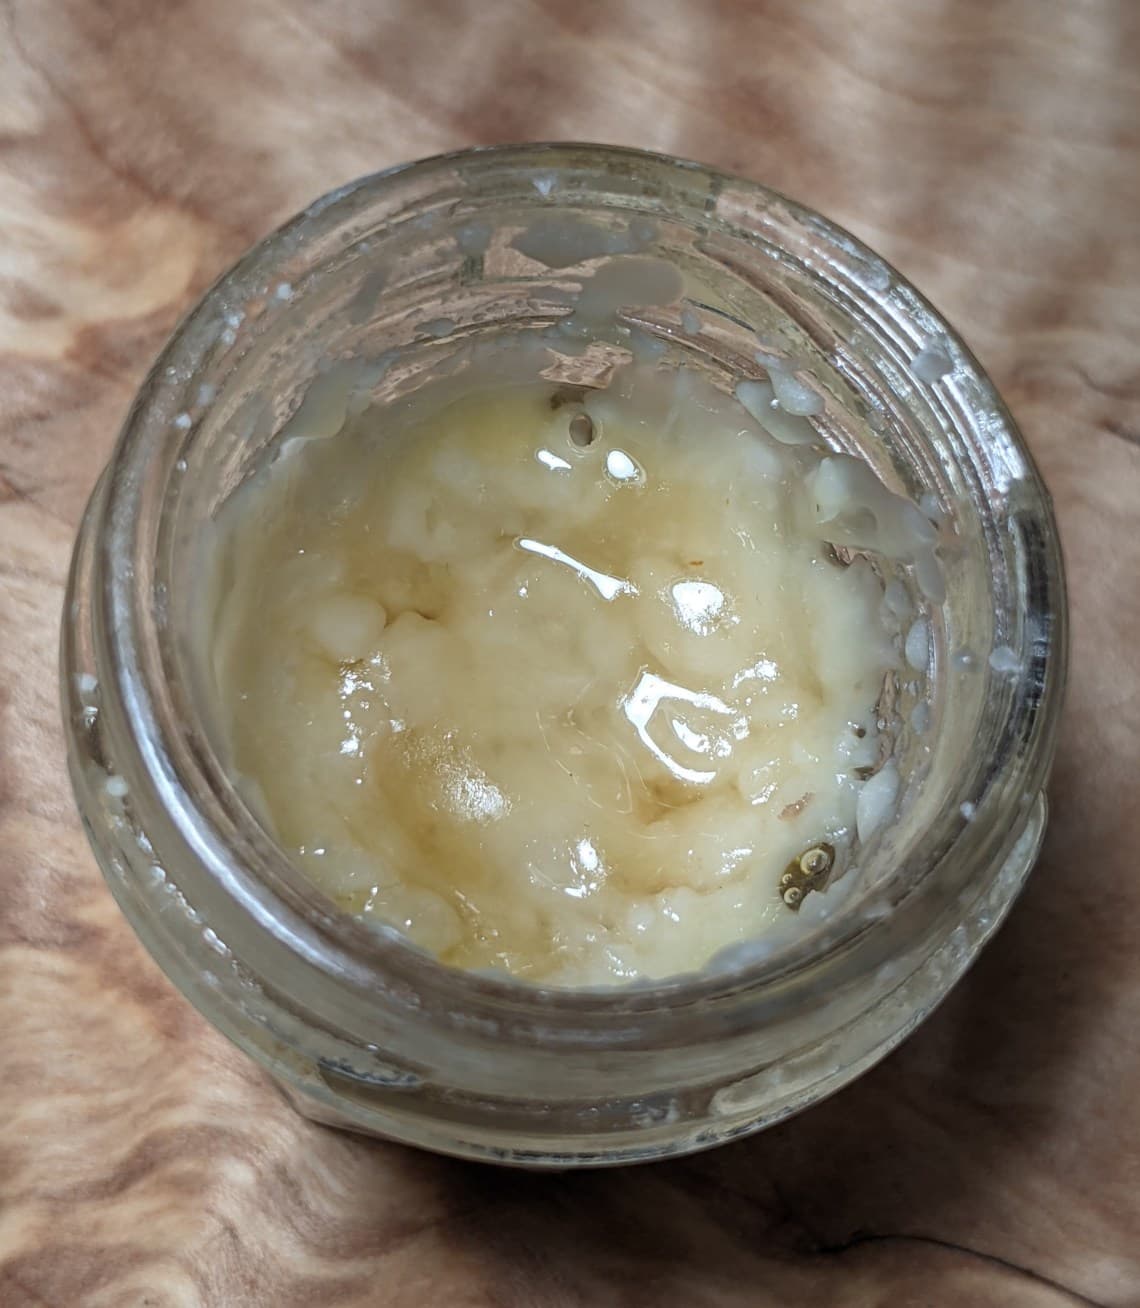
Hash rosin is the most versatile solventless extract, it is a true full spectrum extract and there is a wide catalogue of products you can make from hash rosin. To make hash rosin you first need to know how to make bubble hash (aka Ice Water Hash). You use Ice, Water, Agitation and 25 – 220 micron (μ) filter screens to separate plant matter from trichomes– the small wax-enclosed glandular heads that contain up to 90% of the plants cannabinoids, terpenes and flavonoids. There is no need for non-polar solvents like ethanol or butane, so this is known as a ‘solventless’ extraction method.
Isn’t Water a Solvent?
Ice Water extraction uses no solvents. It is a physical extraction method where ice water is used to transport the trichomes through a series of mesh bags with varying micron levels. The ice water keeps the trichomes from melting and smearing into the mesh, so it is critical that you work in a decently cold environment.
THC/CBD is non-polar, so it does not dissolve in water (as anyone who has tried to clean a bong with water has learned). The water carries trichomes through the mesh, like sand being carried away by a river.
Tools needed:
- Harvest Right Freeze Dryer (Pharmaceutical Model)
- Filter Bags (a.k.a Bubble Bags)
- I prefer all mesh bags
- 45μ, 73μ, 120μ 160μ & 220μ are my most used bags
- Agitation Vessel
- Collection Vessel
- Inline Water Filter (Single Stage Carbon Filter)
- Prevents your hash from tasting like chlorine
- Collection Spoon
- Metal Clamps
- Cold Water Rinse system (option A)
- 1/4 HP Water pump
- Outlet On/Off switch
- 10′ Drinking Water Hose
- Spray Head (with flat spray option)
- Cold Water Rinse system (option B)
Consumables:
- Cannabis (Fresh Frozen, or Dry)
- I rarely wash less than a QP (112grams) even for test samples
- ICE (40+ lbs minimum)- Large 1.25″ Draft ICE is best
- Heavy Duty Parchment Paper
Fresh Frozen Vs Dried Material
You can make ice hash from either fresh frozen or dried cannabis. The input material will have a direct correlation with the output hash. There is no magic here… fire in, fire out. Garbage in, garbage out.
Fresh frozen – lighter bubble hash that is higher in monoterpenes (fruit and gas flavours)
Dried material – darker golden brown/yellow hash. It will be higher in sesquiterpenes (cured flavour profile)
How To Trim Cannabis for Bubble Hash
Fan leaves with no trichomes should be removed as soon as the plant is harvested. Fan leaves with trichomes can be run together, removed & run separately or used for edibles. Sugar leaves should always be left on, removing them can only be accomplished by cutting leaves in half, which will release chlorophyll and colour the hash green
How to Fresh Freeze Cannabis for Ice Hash
If you decide to run fresh frozen material it must be frozen quickly. To do this I use a chest freezers and these woven baskets which allow the plant material to freeze quickly without wilting or chlorophyll bleeding. For small batches I remove all fan leaves at the stem. DO NOT CUT LEAVES IN HALF… only remove leaves at the stem. You don’t want green hash. Leaving fan leaves on entirely is an option too, one that is much better than running trimmed material where cell walls have been ruptured.
Best option is to defoliate a few days or weeks before harvest. This will allow all those cuts to heal minimizing chlorophyll bleed.
Put the cannabis into the freezer as quickly as possible.
The flowers should be bagged up into Large Ziploc Freezer bags within 4-12 hours of being put in the freezer to prevent freezer burn. You can go straight to the freezer bag but I find freezing in open trays or containers helps preserve bud structure and increases quality. If going straight to bag leave the bags open for the first few hours to prevent condensation from building up inside the bags.
Cold Water Rinse System
When you are collecting hash you will want ice cold water to rinse it with. Tap water is rarely cold enough, and is usually full of chlorine. I use a 20 gallon bin filled with filtered water and ice. The Hashtek Rinse Pump Kit combined with a 55 gallon tote makes the perfect rinse system. Simply dunk the drinking straw
How To Make Bubble Hash
Step 1: Setup for Making Bubble Hash
Setup filter bags inside of your collection tote, matching bag size to tote size. For example I am using 20 gallon bags here in a 20 gallon tote. Setup the bags from smallest to largest. For full spec I will setup as:
45μ > 160μ
Pre-Chill your water down to minimum 36F or 2C. These days we largely recommend no ice in the agitation vessel. Instead put your ice in the collection vessel and recirc until it is cold (or simply used the craft cold water tank to have cold water on demand)
A Pre-Soak Screen can be used to help submerge the material during the pre soak.
Pre-Soak Times for Ice Water Extraction:
- Fresh Frozen: 5-20 minutes
- Dried Material: 30-90 minutes
Fresh frozen does not need to be soaked long, unless it has been sitting in the freezer for a while and has started to dry out itself and become crispy.
The reason for soaking is to allow the plant material to rehydrate, preventing shearing and contamination during agitation.
Step 2: Agitation
Your goal is to separate the trichomes from the plant matter without breaking up too much of the plant matter. This is what Hashtek’s top-down agitation systems are designed to do. If you don’t have a Hashtek agitator you can do it the old school way with a stainless steel paddle.
Agitation cycles are typically 3 – 20 minutes. With a total of 40-120 minutes of total agitation time being what we see most commonly depending on the intended outcome.
[fvplayer id=”1″]
Step 3: Filtering
There are usually two main micron ranges I collect:
Option A: 45μ-159μ Full Spectrum: This is my preferred fraction of bubble to use for commercial hash rosin production. Captures the full profile, yields the most and only leaves you with three collection bags to wash. Waste is minimized and you only have to collect bubble from one bag, the 45μ. But you likely will not be winning any hash rosin competitions if leaving in the 45μ.
Option B: 74μ – 119μ or (74μ – 159μ) Broad Spectrum – If I want to make a really clean vaping hash I’ll throw in a 73μ bag in order to filter out some more of those broken heads that you tend to get in the 45. The 46μ-71μ can be used for edibles, lower grade hashish or even thrown out if you’re in a state that is saturated.
IMO narrowing the fraction any further is typically not necessary for hash rosin since you will be filtering again when you press the bubble into hash rosin. For something as tight as a 90μ-119μ first pull fraction I would just dab it as ice water hash (aka melt).
Step 4: Rinsing/Sieving
Hash needs to be rinsed and flushed before collection. There are three main reasons for rinsing
- Move the hash to one area of the bag for easy collection
- Wash through any water soluble impurities or foam that may be temporarily trapped in the bag
- Filter through any smaller micron levels that may have gotten caught up in a slurry of hash
[fvplayer id=”2″]
Often times, especially when running dry material, the 160μ bag will have a large amount of hash trapped in it. Rinsing thoroughly will help push the smaller micron trichome heads to their appropriate filter level. Use a garden sprayer on the “flat” mode and don’t be shy when rinsing/flushing the hash. I like to hit it pretty hard with the clean water rinse. This is your one chance to clean up the hash so use it wisely. Only rinse with ice cold water.
Step 5: Bubble Hash Collection
Prepare drying trays by lining them with parchment paper. I use a Harvest Right Freeze Dryer to dry my hash. They are expensive but pay for themselves in no time. Air drying techniques like the microplaning tek leave you with a darker, often inferior quality hash (due to oxidation during the drying stage). There is also a much greater risk of microbial growth during air drying vs freeze drying.
The longer you wash, the more green/brown and contaminated your hash will get. Fresh frozen tends to go green while dried material goes towards brown when it is over agitated. How much you want to collect is personal preference. I use the cleanest material for dabbing out of the Peak Pro (after pressing into hash rosin) while subsequent pulls are usually used for hash rosin joints.
Step 6: Drying
Go to Custom Setting on your Harvest Right Freeze Dryer (see here for a comparison of Harvest Right models) and input the following:
Shelf Temp: 10-45 F
Final Dry: 24:00
The default shelf temp setting of 55F is a bit too hot for hash, especially since the units run a bit warmer than the preset temp. If you ever get hard chunks in your hash (that are not frozen water due to insufficient drying) there is a good chance you baked your hash with too warm of a shelf temp.
Running lower shelf temps can increase terpenes but also extend drying times. Play around with the shelf temp as a variable.
Load the trays in the freeze dryer. If the trays are pre-frozen you can lower the freezing cycle down to 30 min. if not pre frozen give it a good 4-10 hr freezing cycle. You want to make sure the material is fully frozen before the vacuum pump kicks on. The compressor is not crazy strong on the harvest right units.
Below you can see the difference in appearance between using fresh frozen cannabis and dried input material:
How to Press Hash Rosin
Items Required:
- Bubble Hash
- Rosin Press
- Budget/Home use: Dab Press
- Commercial/Production: Sasquash V2, Sasquash Yeti 10-ton and 55-ton
- Fine Mesh Stainless Steel Strainer
- Spoon
- 25μ rosin bags (inner bag)
- 160μ rosin bags (outer bag)
- Parchment paper (I prefer Kirkland or Supreme Rosin paper)
- Scraping tool
- Straight Sided Glass Jar (U-line jars are best)
- Nitrile Gloves
Step 1: Sift the Bubble Hash
Most producers I know sift their freeze dried hash prior to sifting. This helps the hash fill the bags more evenly and can help prevent blowouts. Do not bother trying to sift air dried bubble hash, it will be too sticky. If you are working with air dried material use your fingers to make an elongated bar that you can freeze and insert into the bag.
If your hash room is not sufficiently cold the bubble hash will clump together as you try and sift it. If this is the case you may need to forgo sifting the hash. It as mentioned above it can be molded into bars and then frozen and slipped into the bags. You don’t get as even distribution (and presumably slightly lower press yields) but it is much better than trying to sift hash in a warm environment.
Step 2: Fill the 25-micron Bag
Fill the 25 micron bags with 10-18 grams of bubble hash per bag. I have gone up to 25 grams for a 3×5 press but it can decrease yield and increases the risk of blowouts. Trim the tag end of the bag so there is approx. 1.5″ length for the fold-over. If working with high terpene/sticky material it helps to be in a cold room when filling the bags.
If using a larger press you may want to still press multiple small bags on a larger plate (vs using larger bags). If you are having blowouts with large bags try this. It can be challenging to get even distribution in a large bag.
My favourite bags are made by supreme rosin. For a 3×5 press I like 2×4.5 or trimmed down 2×6 bags.
Ensure that the hash is evenly distributed within the bag. This will help improve press yields.
Step 3: Double bag the hash with the 160-micron bag
Double bagging your bubble hash is a key step in preventing blowouts. Place the 25-micron bagged bubble hash into the 160-micron bag
Step 4: Pre Press the Bubble Hash
This is another step for preventing blowouts and increasing press yield. Pre-pressing also give you an idea of how much the bubble hash will yield. Material that looks more “greasy” (e.g. wet/oily) after the pre-press will almost always yield better on the press.
You can pre-press using your rosin press (NO HEAT) or you can do multiple pucks at a time in a vice grip as shown below. Pressure applied should be firm but not excessive enough to blow out the bags.
After the pre-press I like to leave the bags in a jar at room temperature for 2-6 hours before pressing. This allows the trichome heads to come down to room temperature and start to fuse together.
Step 5: How to Fold Parchment Paper for pressing hash rosin
Fold your parchment paper as shown below. Use a 7″ x 18″ piece of parchment paper for pressing 15g of rosin on a 3×5″ press.
Although the photos below show multiple pucks being pressed on the same paper -this is not really the best way to do it- it just makes a great photo-op. Pressing one bag per parchment paper allows you to get it in the fridge quickly, and reduce oxygen exposure. This is critical to protecting the quality of the hash rosin. Remember that when the rosin is hot off the press it is the most susceptible to oxidation.
Step 6: Press the Hash Rosin
Heat up the press to 170F (76C). I press almost all of my hash at this temperature. For fresh frozen material you can get away with lower temps but I like the profile of fresh dried material more. The high mono terpene content in fresh frozen material I find tickles my nose/throat, I digress… fresh frozen vs fresh dried is a debate for another post.
The key to pressing hash rosin without blowouts is to apply minimal pressure until the bag wets through entirely. It is hard to see as you need to squint between the plates but once the hash rosin starts too ooze you can gradually increase pressure towards max. I personally think a pressure gauge is not necessary, unless you are in a commercial production environment. I can yield 80%+ on the press with only a 6-ton bottle jack style 3×5 press. Average press yields are 65-80%.
Inspect the pressed rosin puck. It should look hollow in the middle with all the remaning lipids pushed out to the edges of the bag.
I usually freeze all of my pressed pucks. They can be used for edibles or terpenes can be pulled off of them if making vape carts.
Step 7: Cure the Hash Rosin
The final step is to put the hash rosin into a jar and allow it to “cure”. The cured product almost always tastes better than fresh press rosin. The complex molecular reactions that occur during the aging process are currently being investigated by the trichome research initiative started by the late Frenchy Cannoli. Rosin will typically go from a sticky/shatter product to an easy to handle butter/batter style product after the cure. Curing from fresh-press to shelf stable butter can take anywhere from 3 days to months. I have found cure temperature and terpene content to be the main determinants of cure time.
The glass jar should have a tight fitting metal lid with gasket, and should be appropriately sized to minimize head space. The jar should be straight sided to make removal easy. U-line makes the best jars jars for hash rosin hands down. They have a thick gasket that keeps your terpenes safe. Amazon has decent options available too, just make sure you have a very tight fitting seal. If the terpenes are allowed to escape your final product will be very one dimensional like a distillate.
The cure can be done at room temperature or in the fridge. I prefer to do the initial phase at room temperature and then do the post-homogenization shelf stabilization at fridge temps. The cure process for me typically looks like this:
- Jar the fresh press
- Cure at room temperature until THC-A finishes nucleation and terpenes seperate out (2-14 days)
- This is confirmed visually by marbling that becomes present
- Homogenize the rosin (stir with a dab tool)
- Cold cure/store in fridge from there
Note that step 2 can be done at fridge temperatures. I have found this really slows down the nucleation without adding too much to the final quality.
Hot Cure vs Cold Cure Rosin
In hot cure tek the initial nucleation of THC-A is accelerated by hot oven temperatures above 140F. I strongly recommend against hot curing your rosin. It only shaves 5-10 days off the process and really degrades the product. Look no further than this reddit post for a comparison of hot cure vs cold cure (albeit flower rosin, but still)
Taffy Tek (Fresh Press Homogenization)
Taffy Tek – is used to homogenize hash rosin. You can see my friend botanichemist performing ‘taffy tek’ on fresh pressed hash rosin in the video below. The advantage is that you can package the product in its final jar straight off the press (e.g. letting it butter up in portioned 1g jars). I typically avoid this method as I think it increases oxidation of the rosin (oxidation reactions are accelerated at warm temperatures). With my method you homogenize after the initial cold cure when the product is cold and more stable. I feel ‘taffy tek’ homogenization is more useful in a production environment where cure times need to be accelerated.
Hash Rosin Storage
Hash rosin should always be stored in the fridge post cure. Store in a glass jar with tight fitting metal lid. Silicone should never be used for extract storage as it leads to terpene loss.
Where’s My Bike Hash Rosin Cure:
Day 0:
Day 2: Terpenes starting to separate out
Day 4: Buttering process complete
Day 4: Post agitation
Day 10: fully cured shelf stable batter
Dry Cured Guava Hash Rosin:
9 Day Separation: Terpene layer you could swim in
For what it’s worth this Guava is one my my favourite hash rosin’s profiles. Both in taste but mainly in effect. It is a fine substitute for smoking the gassy Pink Kush that I love. No combustion necessary when this stuff is around
The jar shown above is a calyx jar. They are a good option for packaging, especially since they have reduced head space in the jar from 7mL to 4mL. I would love to see it reduced further to 1.5mL for the 1g format.
Happy hash making folks!